Figure 1. Pinout for transistors
Stepper Motor
Introduction
The purpose of this lab is to control a stepper motor, with instructions received from the PC via a serial communication link to the 8051.
Stepper motors are often used in conjunction with microcontrollers to provide precisely controlled motor power. Stepper motors are devices that rotate a precise number of degrees for each "step" applied, as opposed to regular motors, which simply rotate continuously when power is applied. Driving a stepper motor involves applying a series of voltages to the four(typically) coils of the stepper motor. The coils are energized one or two at a time to cause the motor to rotate one step.
Assignment:
Apparatus Required:
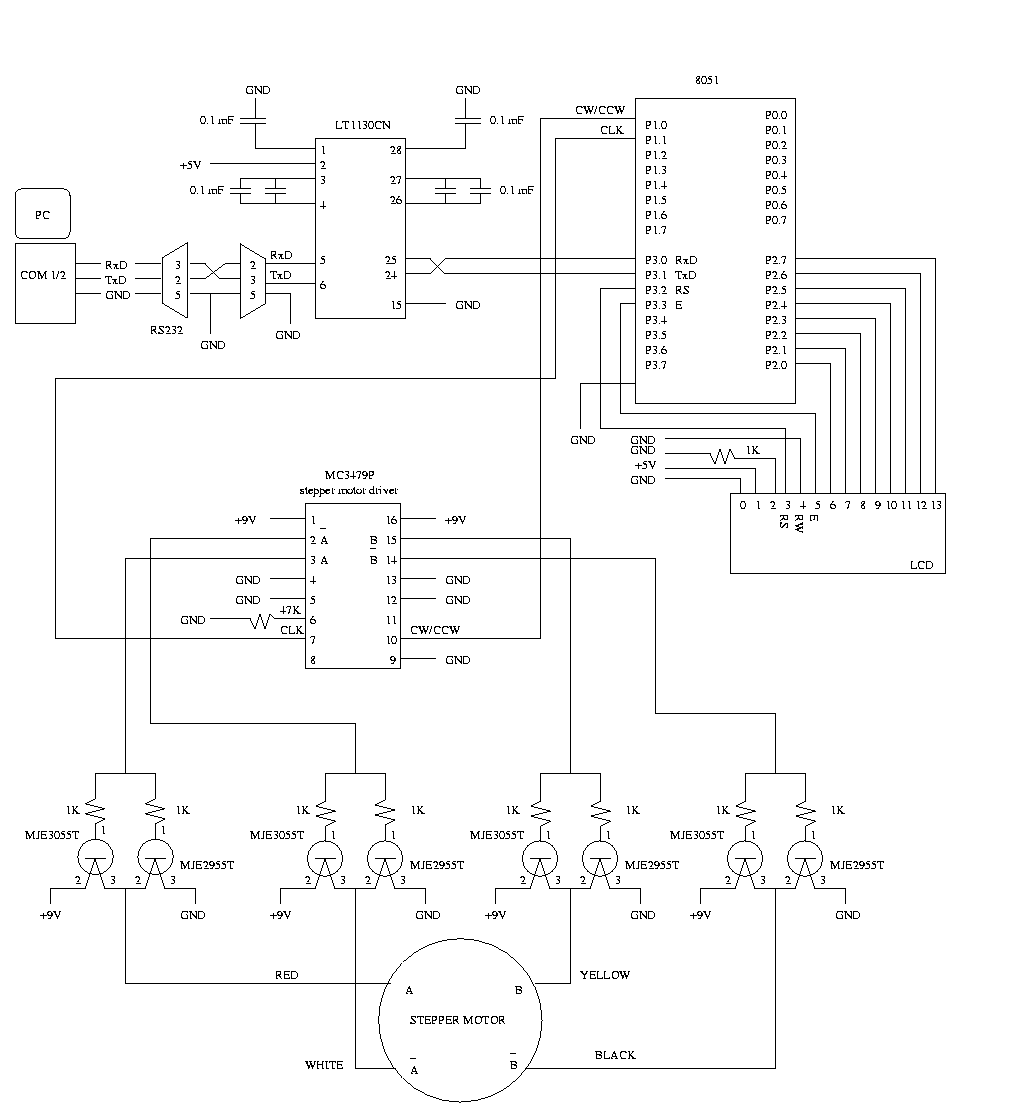
Schematic:
Program:
#pragma SMALL DB OE
#include <reg51.h>

unsigned char ReceiveSerial() {

	unsigned char c;

	TMOD = 0x20;	/* configure timer for the correct baud rate */
        TH1 = 0xe6;     /* 1200 bps for 12 MHz clock */
        TCON = 0x00;    /* Set timer to not running */

	SCON = 0x50;    /* Set Serial IO to receive and normal mode */
	TR1 = 1;	/* start timer to Receive */
	while( (SCON & 0x01) == 0 ) /* wait for receive data */;
	c = SBUF;
	return c;
}

void SendSerial(unsigned char c) {

        /* initialize..set values for TMOD, TH1 and TCON */
        /* set the Tx interrupt in SCON to indicate sending data */
        /* start timer */
        /* write character to SBUF */
        /* wait for completion of sent data */
}

void main(void) {

	unsigned char c;

	while( 1 ) {

           /* Use ReceiveSerial to read in a character */
           /* Depending on character make the motor move left or right */
           /* and display the direction on the LCD */
        }
}
Procedure:
Note: The circuit requires two different voltages
but you need a common ground.
CAUTION: Transistors can get very hot.